| 일 | 월 | 화 | 수 | 목 | 금 | 토 |
|---|---|---|---|---|---|---|
| 1 | 2 | 3 | ||||
| 4 | 5 | 6 | 7 | 8 | 9 | 10 |
| 11 | 12 | 13 | 14 | 15 | 16 | 17 |
| 18 | 19 | 20 | 21 | 22 | 23 | 24 |
| 25 | 26 | 27 | 28 | 29 | 30 | 31 |
- 판다스
- 데이터분석
- chatGPT
- NLP
- fastapi #파이썬웹개발
- MachineLearning
- deeplearning
- pytorch
- 파이토치
- pandas
- 파이썬웹개발
- 파이썬
- fastapi #python웹개발
- 자연어분석
- HTML
- 랭체인
- 한빛미디어
- konlpy
- 챗gpt
- 사이킷런
- 머신러닝
- sklearn
- 딥러닝
- OpenAIAPI
- Python
- programmablesearchengine
- langchain
- 판다스 데이터정렬
- fastapi
- 비지도학습
- Today
- Total
Data Navigator
FastAPI로 이벤트 플래너 만들기 03 - 라우트 구현 - 본문
FastAPI로 이벤트 플래너 만들기 03
- 라우트 구현 -

이벤트 플래너의 라우트를 구현하자.
사용자 라우트는 회원가입, 로그인, 로그아웃으로 구성된다.
1. 사용자 라우트 구현
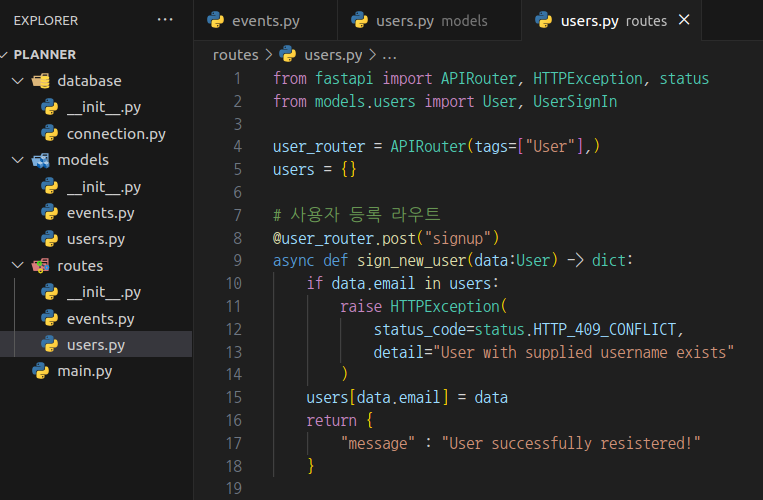
1) routes 디렉토리의 user.py에 사용자 등록 라우트를 구현한다.
# rought 디렉토리의 users.py
from fastapi import APIRouter, HTTPException, status
from models.users import User, UserSignIn

user_router = APIRouter(tags=["User"],)
users = {}

# 사용자 등록 라우트
@user_router.post("signup")
async def sign_new_user(data:User) -> dict:
    if data.email in users:
        raise HTTPException(
            status_code=status.HTTP_409_CONFLICT,
            detail="User with supplied username exists"
        )
    users[data.email] = data
    return {
        "message" : "User successfully resistered!"
    }
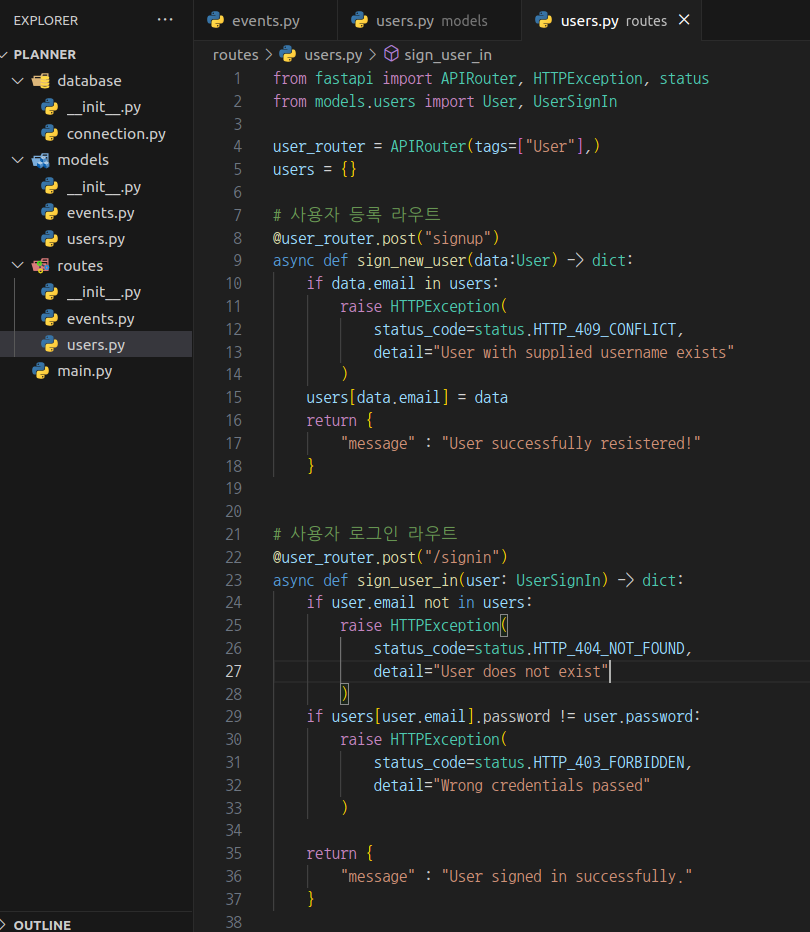
2) 이어서 사용자 로그인 라우트를 구현한다.
# 사용자 로그인 라우트
@user_router.post("/signin")
async def sign_user_in(user: UserSignIn) -> dict:
    if user.email not in users:
        raise HTTPException(
            status_code=status.HTTP_404_NOT_FOUND,
            detail="User does not exist"
        )
    if users[user.email].password != user.password:
        raise HTTPException(
            status_code=status.HTTP_403_FORBIDDEN,
            detail="Wrong credentials passed"
        )

    return {
        "message" : "User signed in successfully."
    }
2. main.py에 라우트 등록 및 테스트
사용자 route를 구현했으니 main.py에 등록하고 어플리케이션 동작을 테스트한다.
1) main.py 작성
# planner/main.py
from fastapi import FastAPI
from routes.users import user_router
import uvicorn

app = FastAPI()

# 라우트 등록
app.include_router(user_router, prefix="/user")

if __name__ == "__main__":
    uvicorn.run("main:app", host="127.0.0.1", port=8000, reload=True)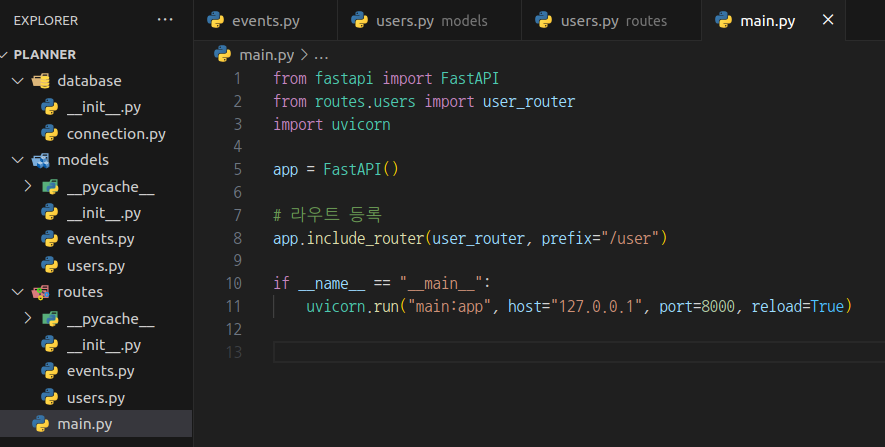
2) 웹서버 실행
main.py에 uvicorn을 임포트 하고 __name__이 main 일 경우 서버를 실행하는 내용을 작성해 놓았기 때문에 python 파이썬 파일로 웹서버를 실행 할 수 있다. 아래의 명령으로 서버를 실행해 보자.
python main.py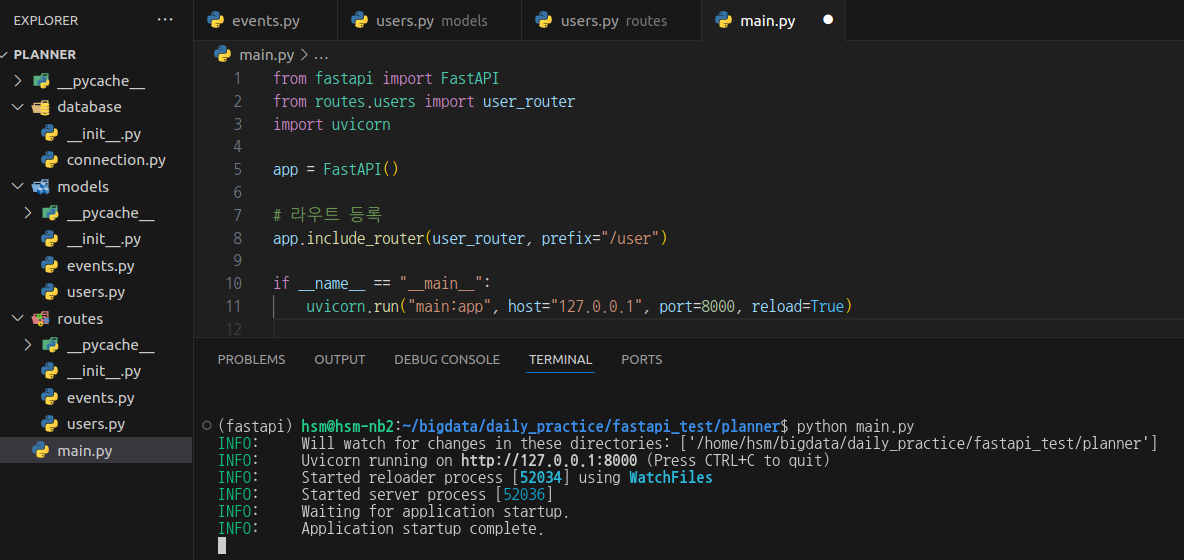
3) 웹브라우저를 실행시키고 localhost:8000/docs 에 접속해서 라우트를 테스트한다.
/usersignup에 접속해 Tryitout을 누르고 email과 password 를 넣고 테스트 한다.
password는 모델을 만들때 pydantic의 emailstr을 사용했기 때문에 간단한 것은 사용할 수 없으며 영문, 숫자, 특수문자등을 조합해서 넣어야 한다. Class Config에서 정의해 놓았던 예시를 그대로 이용해 테스트하자.
"email" : "fastapi@naver.com",
 "password" : "str0ng!!!!",
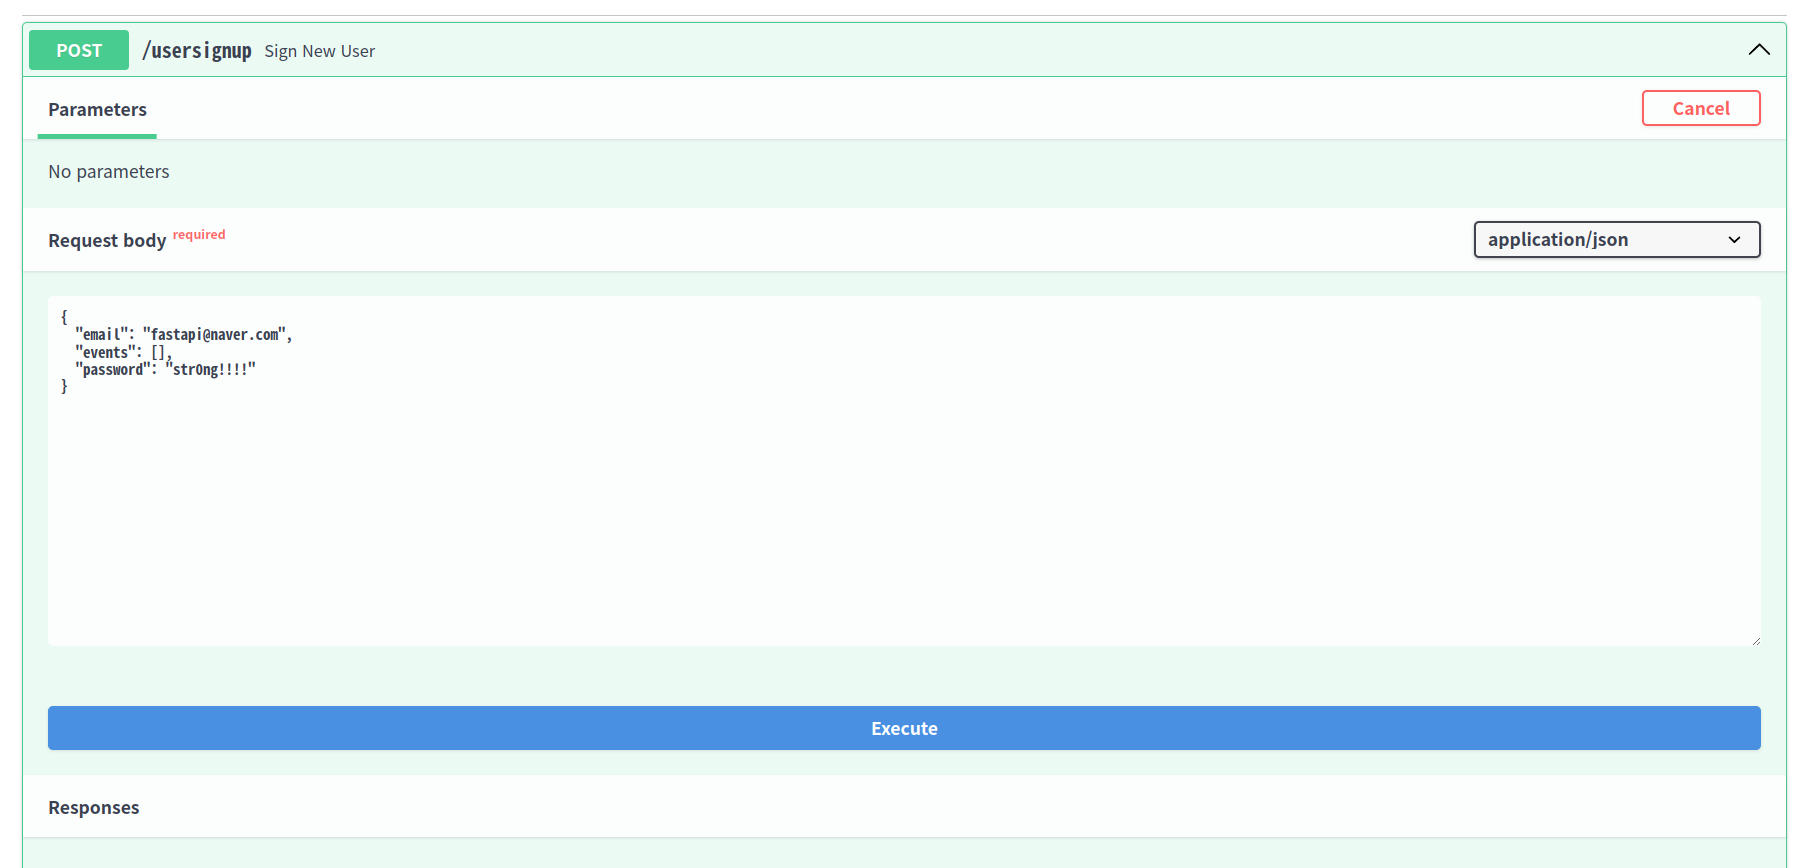

정상적으로 실행 되었다면 위와 같이 User successfully resistered!. 가 출력된다.
excute를 다시 한 번 실행해보자.

그럼 이미 등록한 아이디이기 때문에 위와같이 User with supplied username exists. 가 출력되어야 정상이다.
4) 로그인 라우터도 테스트하자.
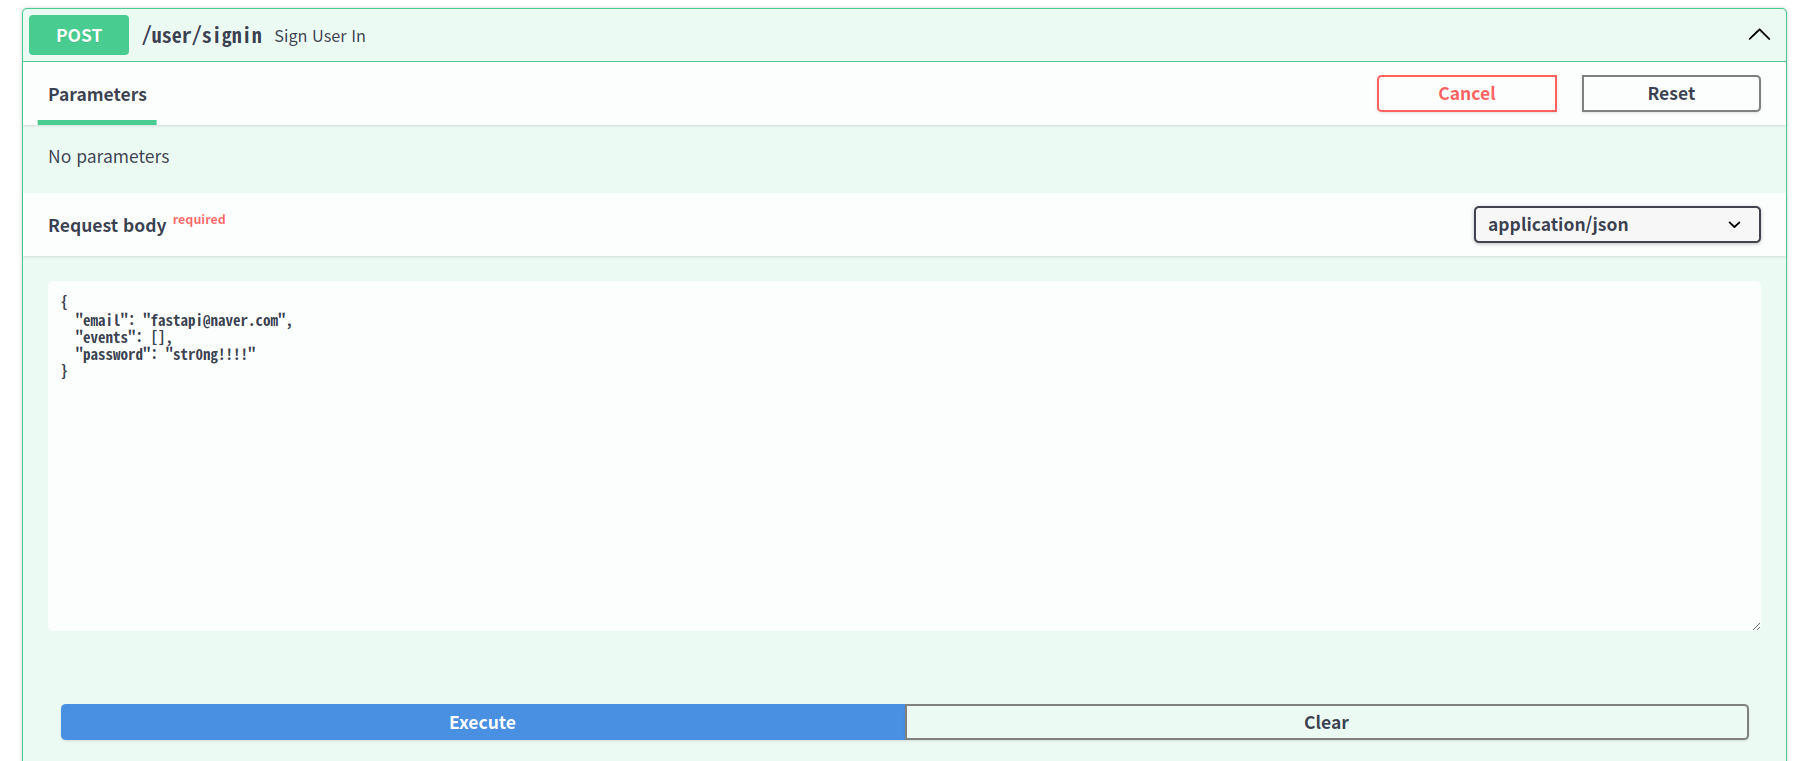
위에서 등록한 email과 password를 동일하게 입력하고 excute를 눌러 테스트한다.

User signed in successfully가 출력되면 정상이다.
패스워드 부분을 다르게 변경해서 패스워드가 틀렸을 경우를 테스트하자.
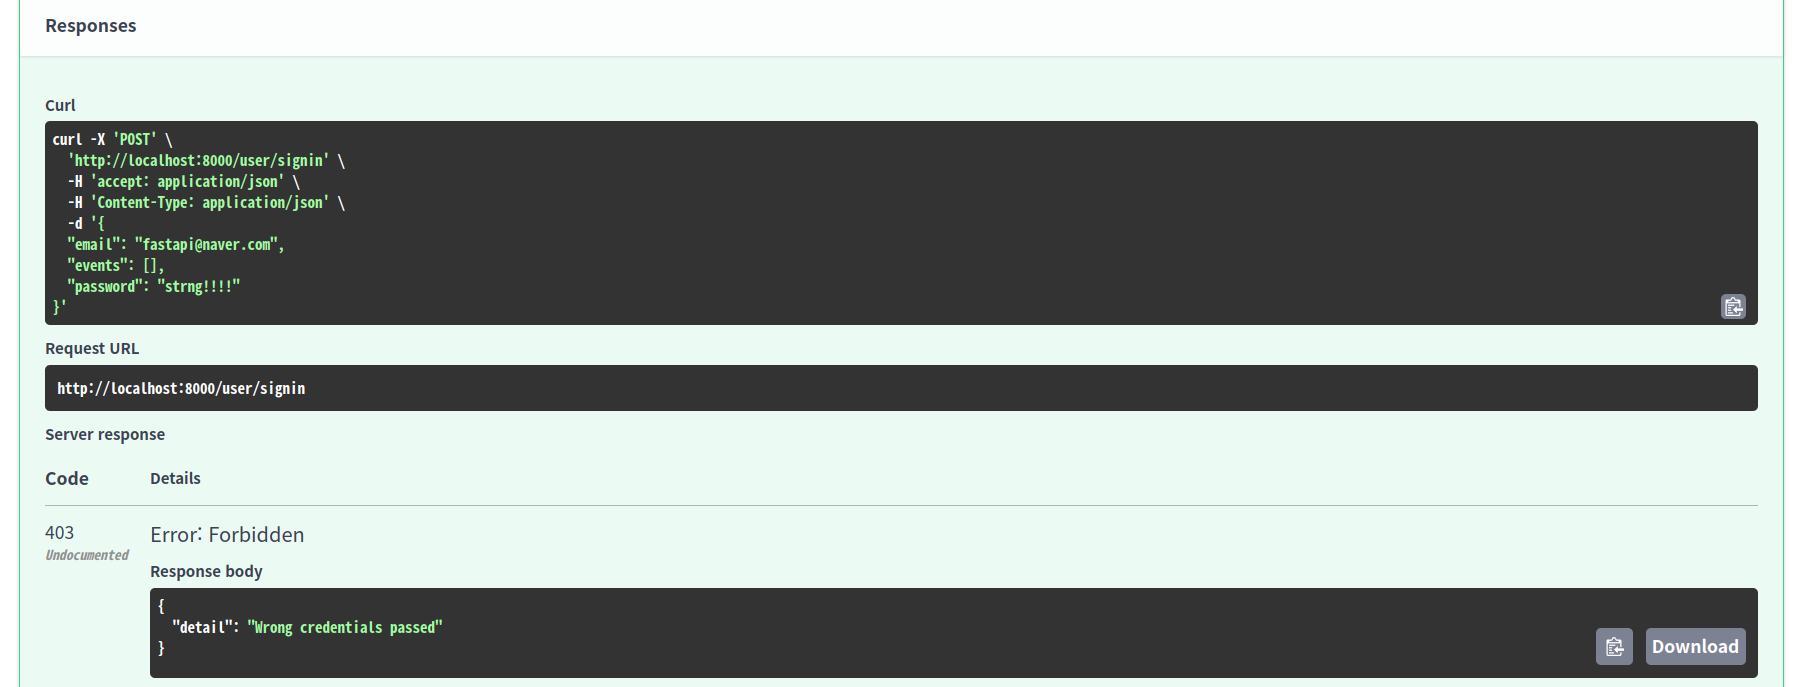
403에러가 나면서 Worng credential passed가 출력되면 성공이다.
3. 이벤트 라우트 구현
이번에는 이벤트 라우트를 구현한다.
이벤트 라우터는 이벤트 생성, 단일 이벤트 삭제, 전체 이벤트 삭제를 우선 구현한다.
1) routes 디렉토리의 event.py에 필요한 라이브러리를 임포트하고 APIRouter 인스턴스를 생성한다.
# routes/events.py
from fastapi import APIRouter, Body, HTTPException, status
from models.events import Event
from typing import List

event_router = APIRouter(
    tags=["Events"]
)

events = []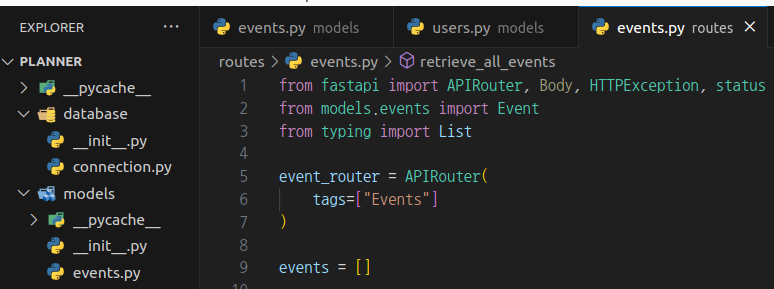
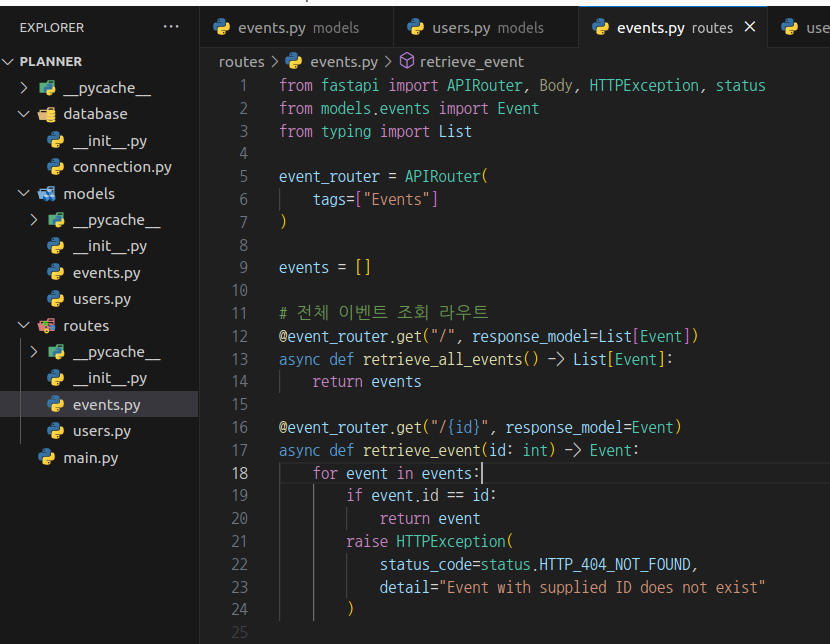
2) 모든 이벤트 / 단일 이벤트를 조회하는 라우트를 위의 코드 아래에 작성한다.
# routes/events.py

# 전체 이벤트 조회 라우트
@event_router.get("/", response_model=List[Event])
async def retrieve_all_events() -> List[Event]:
    return events

@event_router.get("/{id}", response_model=Event)
async def retrieve_event(id: int) -> Event:
    for event in events:
        if event.id == id:
            return event
        raise HTTPException(
            status_code=status.HTTP_404_NOT_FOUND,
            detail="Event with supplied ID does not exist"
        )
3) 이벤트 생성 및 삭제 라우트를 생성한다.
# 이벤트 생성 라우트
@event_router.post("/new")
async def create_event(body: Event = Body(...)) -> dict:
    events.append(body)
    return {
        "message" : "Event created successfully."
    }

# 단일 이벤트 삭제 라우트
@event_router.delete("/{id}")
async def delete_event(id: int) -> dict:
    for event in events:
        if event.id == id:
            events.remove(event)
            return {
                "message" : "Event deleted successfully."
            }
    raise HTTPException(
        status_code=status.HTTP_404_NOT_FOUND,
        detail="Event with supplied ID does not exist"
    )

# 모든 이벤트 삭제 라우트
@event_router.delete("/")
async def delete_all_events() -> dict:
    events.clear()
    return {
        "message" : "Events deleted successfully."
    }
4) main.py에 event 라우트 추가
# planner/main.py
from fastapi import FastAPI
from routes.users import user_router
from routes.events import event_router  # event 라우터 추가
import uvicorn

app = FastAPI()

# 라우트 등록
app.include_router(user_router, prefix="/user")
app.include_router(event_router, prefix="/event")  # event 라우터 추가

if __name__ == "__main__":
    uvicorn.run("main:app", host="127.0.0.1", port=8000, reload=True)
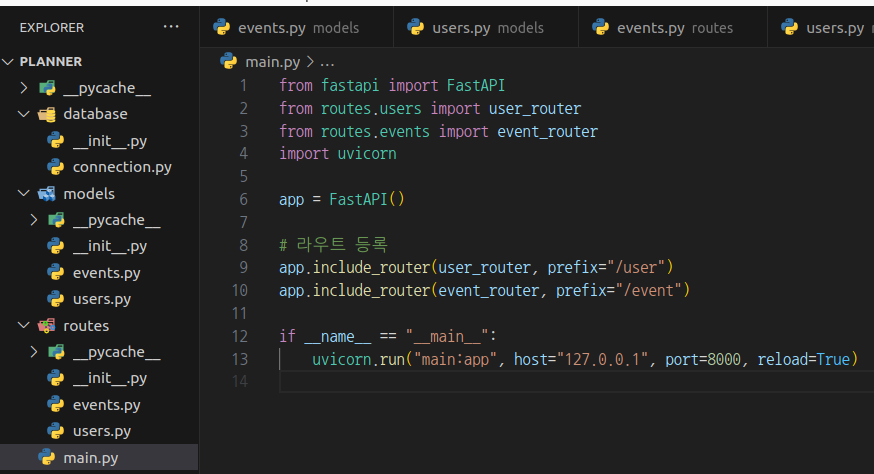
5) 서버를 실행하고 docs로 들어가서 위에서 생성하고 등록한 라우터들이 잘 작동하는지 테스트한다.
(1) 먼저 POST /event/new 에 가서 try it out을 누르고 아래의 내용을 등록해 보자.
# post /new

{
  "id": 10,
  "description": "이벤트 플래너 데이터 샘플10",
  "image": "https://www.urbanbrush.net/web/wp-content/uploads/edd/2022/11/urbanbrush-20221108214712319041.jpg",
  "location": "서울",
  "tags": [
    "python",
    "fastapi",
    "book",
    "sample"
  ],
  "title": "이벤트 플래너 샘플10"
}

정상적으로 등록이 되었다면 위와 같이 Event created successfully 가 출력된다.
번호를 바꿔 가면서 몇 개 더 등록한다.
(2) 등록한 이벤트들을 GET /event/ Retrieve All Events에서 조회해 보자.
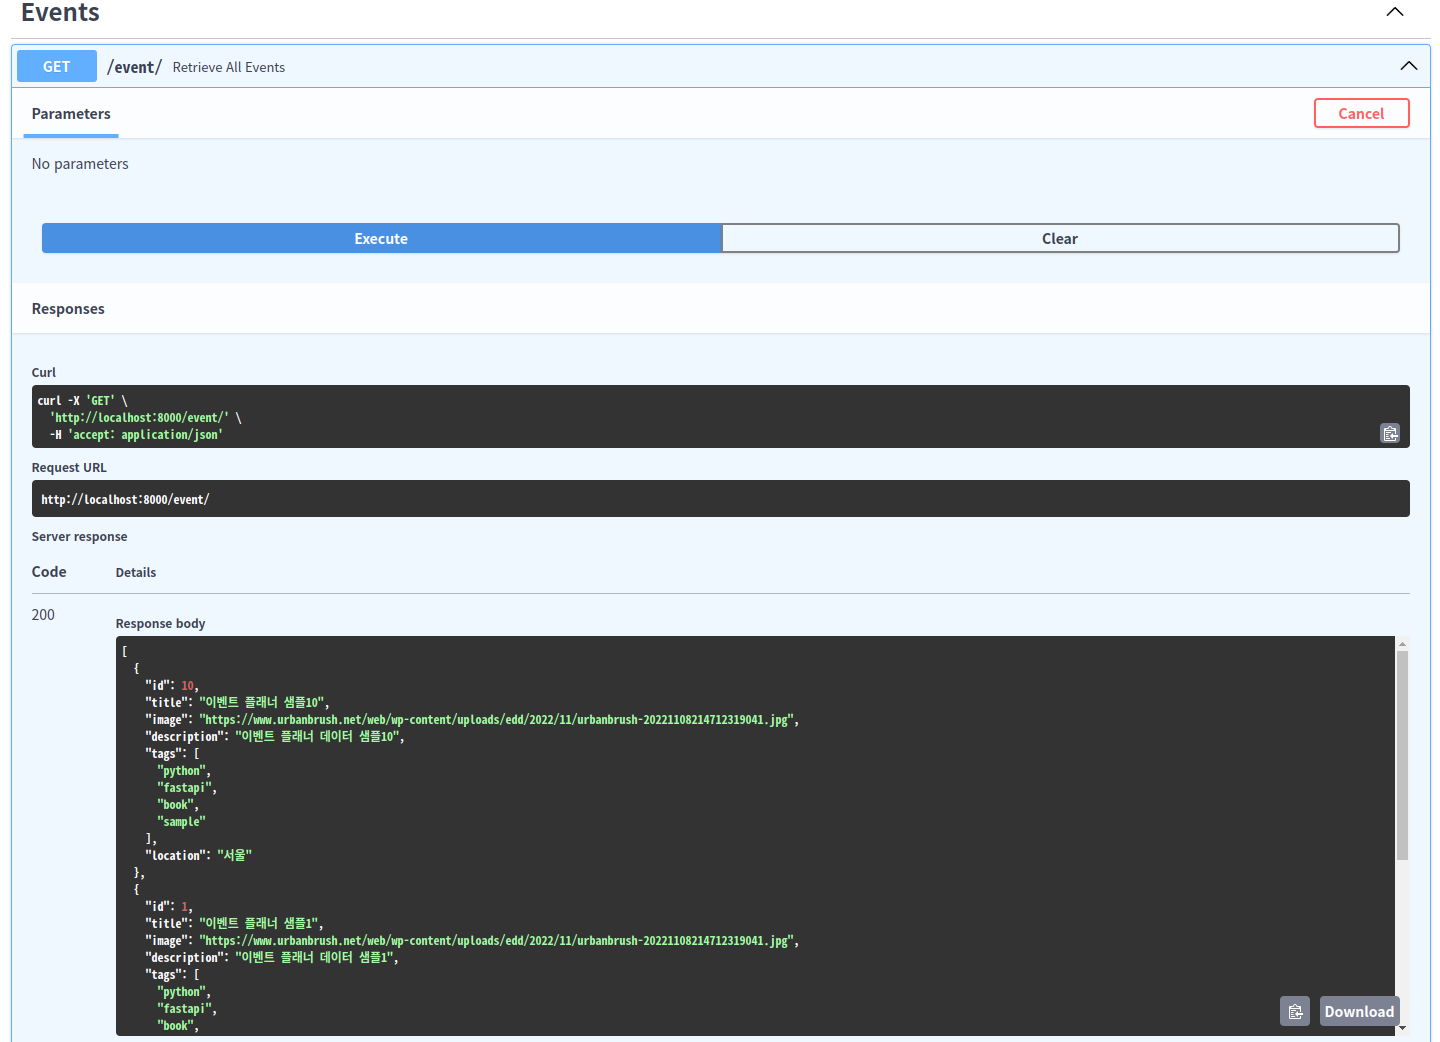
위와 같이 여러 개가 조회되면 성공
(3) 등록한 이벤트를 GET /event/{id} Retrieve Events에서 id 번호로 이벤트 1개를 조회해 보자.

id를 넣었을 때 제대로 결과가 나오면 성공이다.
(4) delete 라우트를 테스트 해보자.
DELETE /event/{id} 에서 id 1번을 삭제해보자.
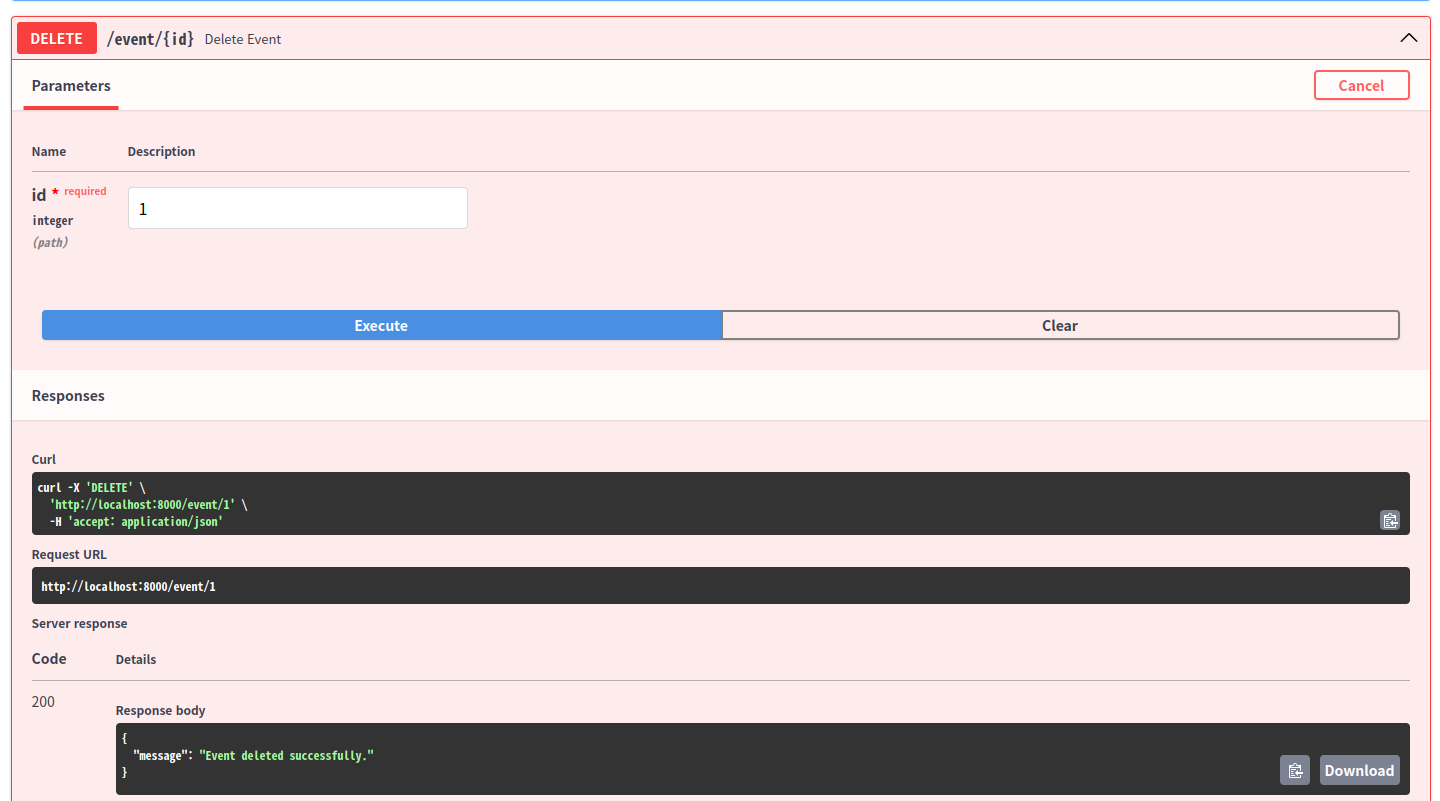
삭제가 정상적으로 되었다면 Event deleted successfully가 출력된다.
Execute를 다시 눌러 DELETE /event/{id} 에서 id 1번을 다시 삭제해보자.

이미 삭제하고 없기 때문에 Event with supplied ID does not exist가 출력되어야 한다.
모든 이벤트를 삭제하는 라우트도 테스트 해보자.
DELETE /event/ Delete All Events에서 try it out 을 누르고 execute를 누른다.
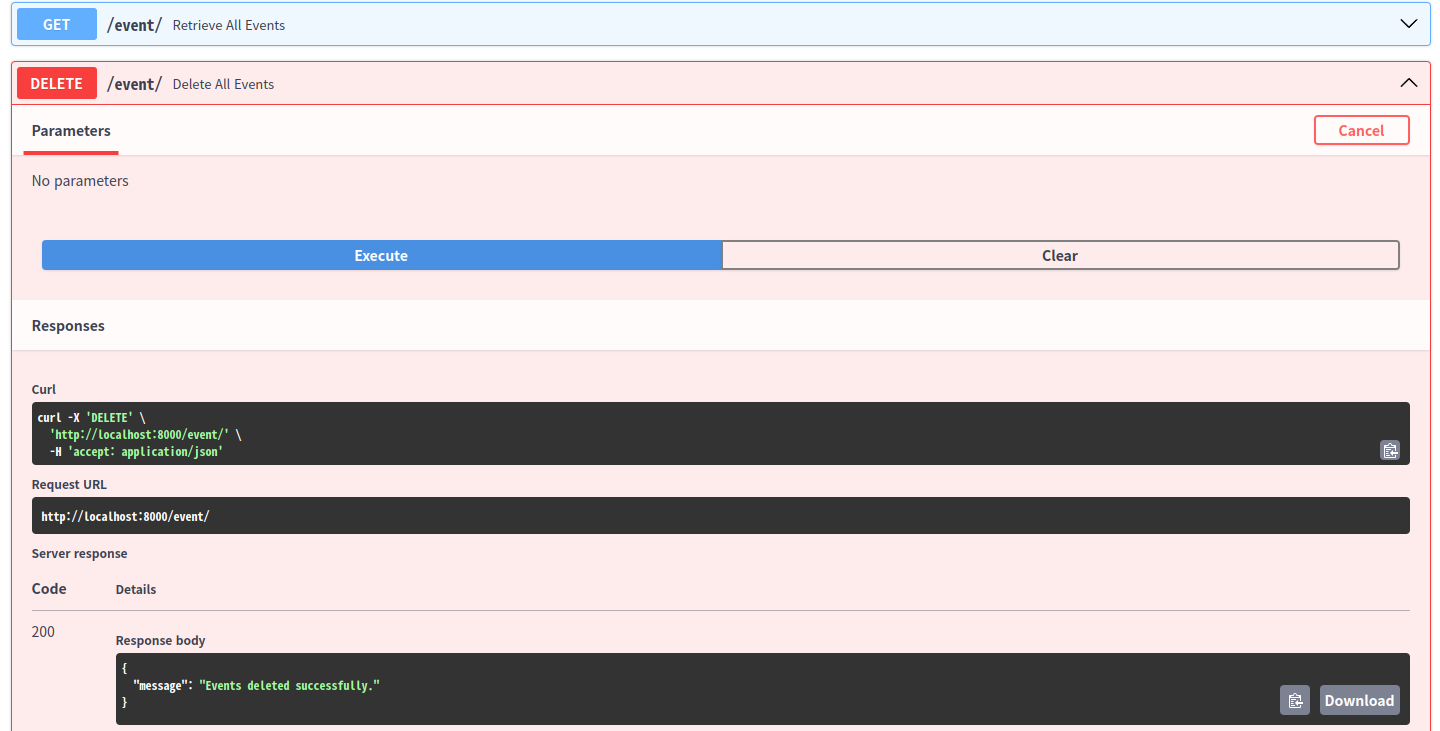
삭제가 정상적으로 되었다면 Event deleted successfully가 출력된다.
출처: 아데시나, 압둘라지즈 압둘라지즈. FastAPI를 사용한 파이썬 웹 개발. 번역 김완섭. 한빛미디어, 2023
'FastAPI' 카테고리의 다른 글
| FastAPI로 이벤트 플래너 만들기 05 - 이벤트 CRUD 구현 - (0) | 2024.05.13 |
|---|---|
| FastAPI로 이벤트 플래너 만들기 04 - DB 연결하기 (0) | 2024.05.12 |
| FastAPI로 이벤트 플래너 만들기 02 - 모델 구현 - (0) | 2024.05.12 |
| FastAPI로 이벤트 플래너 만들기 01 - 환경설정 및 기본 구조 생성 - (0) | 2024.05.12 |
| FastAPI 설치 환경 세팅 및 간단한 테스트 웹 만들기10 - home.html, todo.html 만들기 (0) | 2024.05.12 |


